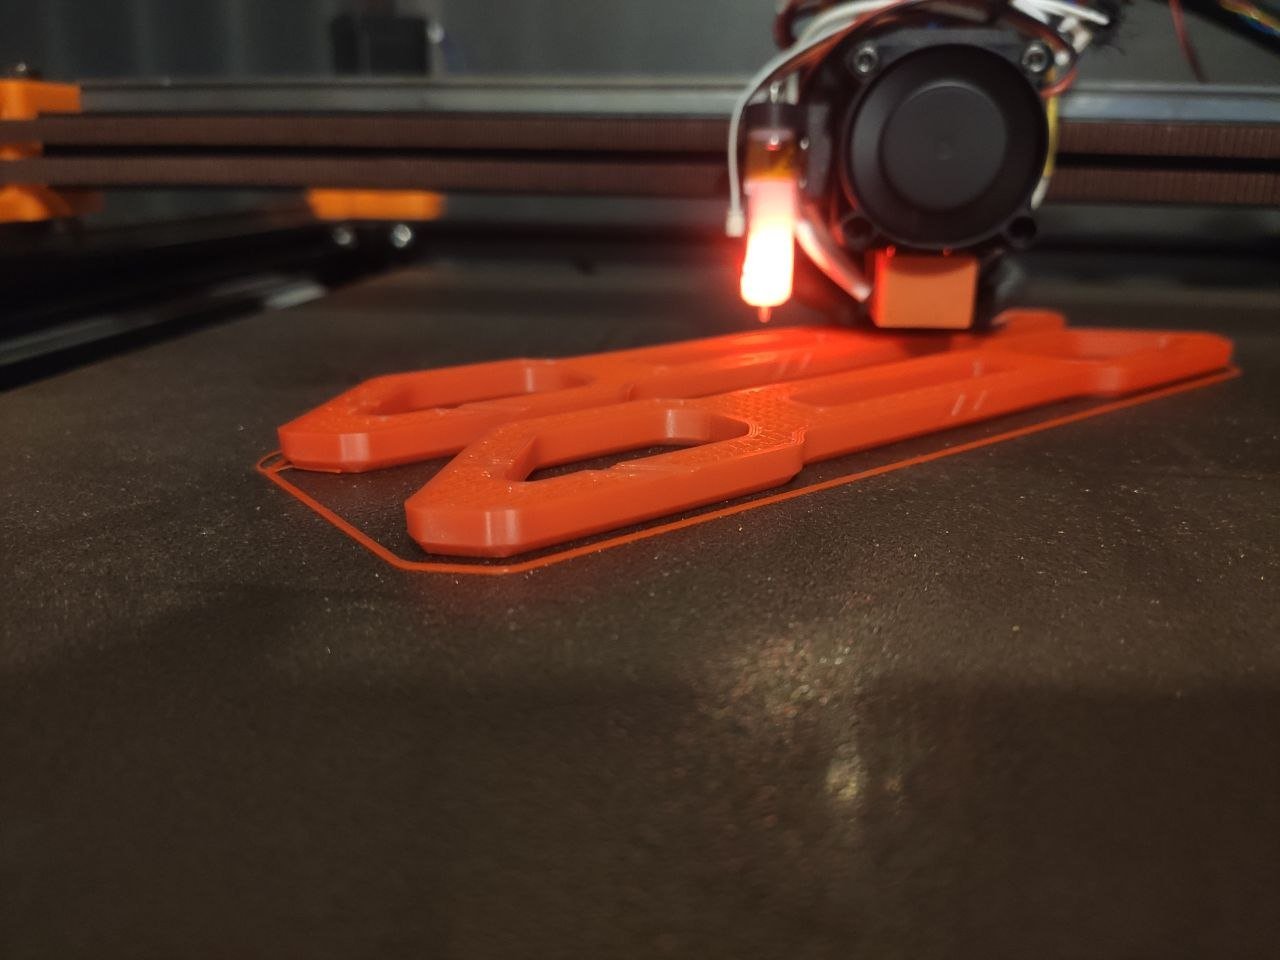
Extruder wear doesn’t announce itself loudly. One day a farm of twenty plus printers is humming along; the next, three machines are turning out parts with ugly walls and the lead time on a big order just evaporated. In a print farm, the extruder is where long-term reliability lives or dies. You can’t afford to treat its wear components like a hobbyist treats a single printer waiting for a click, a grinding noise, or a print failure to tell you something wrong. By then you’re already behind.
The philosophy I’ve adopted over years of running and advising print operations is simple: the extruder’s wear-prone sub-components are predictable consumables, and they need a calendar just like any other scheduled maintenance item. Here’s which parts wear, how to spot their decline early, and the farm-level schedule that keeps your printers producing instead of idling.
The Wear Prone Components You Must Watch
Modern extruders are often a mix of metal, injection-moulded plastic, and 3D-printed components. All of them wear just at different rates and under different stresses.
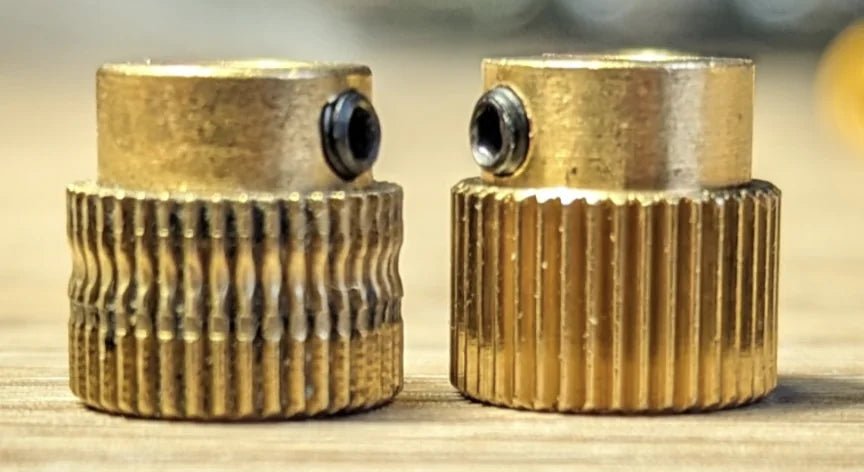
Drive gears (hobbed gears, filament gears). This is the obvious one. Brass or stainless steel gears on some older or even new stock machine will gradually lose their edge even with plain PLA; switch to any abrasive filament like glow-in-the-dark, carbon fibre, glass fibre and a non-hardened gear can be wiped smooth in 50–100 grams. That’s not an exaggeration. I’ve seen customers destroy a fresh gear in a single print. Hardened steel gears are the long-term answer, but even they will eventually wear a polish pattern that reduces grip. Gears are consumables. Accept that, stock them, and check them.

Source: matousek35 / https://forum.bambulab.com/t/extruder-gears-terrible-lifespan/43150
We also recommend ensuring, when feeding abrasive materials through PTFE tubing, and ensure filament isn't rubs against a concentrated spot under load. Otherwise, as shown in the user example below, glow-in-the-dark filament will wear away softer materials like aluminium extrusions fairly quickly.

Credit: tommorox2345 - on MakerBogan Discord
Idler arms and tensioners. If your extruder uses a plastic lever to set filament pressure against the drive gear, that arm is a spring that sees thousands of load cycles in a heated chamber. Cheap PETG or ABS arms can creep under sustained tension and temperature, losing their ability to clamp. That translates to slipping, chewing, and inconsistent extrusion that you’ll chase through slicer settings before the real cause dawns on you. A tension arm that can’t hold its spring force has failed, even if it’s not visibly cracked.
Filament guides and entry points. Every time filament enters the extruder, it’s pulled across a surface. A soft plastic guide will wear a groove within a few hundred hours especially with filled materials. That groove adds friction, which makes the extruder motor work harder and causes fine retraction errors. The symptom is a sluggish, overshooting extrusion response. The best solution we’ve implemented in our own setups is a ceramic insert or a polished metal guide ring, exactly the kind you find feeding an AMS/CFS. It’s a small part that erases a failure point the logs will never flag or you need double check PTFE when you're checking extruder for wear, like below.

Source: johncarter10 / Reddit
Bearings and shafts. Idler bearings in the extruder are often tiny and unshielded. Combine dust and expired grease and you get a rough-rolling bearing that introduces micro-variation into filament feed. It won’t seize; it’ll just inject a subtle “wobble” into your prints that looks like an extrusion problem.
Warning Signs You Can’t Ignore
Forget waiting for the extruder to click. An experienced eye catches the pattern earlier.
-
Infill that looks sparse or gapped compared to your golden reference prints, even with the same gcode. The extruder is slipping on rapid direction changes, so the plastic volume isn’t what the slicer commanded.
-
Outer walls showing under-extrusion at speeds you routinely use. Worn gears and worn filament paths become most apparent on long, steady extrusions where grip and friction matter.
-
Repeatable skips. If you see a regular, repeating band of under extrusion at a consistent Z interval on a tall part, the extruder is hitting a rhythm problem. Often it’s a worn gear tooth, a flat-spotted idler bearing, or a tension arm oscillating because it’s lost spring force. Watch the idler arm during a steady extrusion if it’s visibly bouncing, the mechanism is worn and your prints are confirming it.
The Print Farm Maintenance Schedule
Here’s the preventive rhythm I enforce: every 6 months or 500–1000 print hours, whichever comes first. That’s the cadence at which bearing grease has dried out, gear wear is measurable, and plastic arms may have begun to creep if the enclosure runs hot. For a busy farm, 1000 hours arrives faster than you think about 14 hours of daily operation over two months. If you run printer dark (ie 24/7) its can be once a month or sooner.
Execute this schedule in a staged rotation, not a mass shut-down. Divide your fleet into groups and rotate one group through a 15-minute inspection every six weeks. The process for each printer is:
-
Remove the filament and clean the filament path.
-
Inspect drive gear teeth under magnification and look for polished wear flats and any tooth profile rounding.
-
Check the idler arm for cracks, permanent deformation, or loss of spring tension. Replace if it doesn’t snap back crisply.
-
Examine the filament guide (entry hole, Bowden connector inlet) for grooves. If a groove catches a fingernail, it’s adding friction.
-
Clean and re-grease idler bearings. Use a synthetic PTFE-based grease rated for plastic and especially metal gears and your enclosure temperature avoid generic white lithium that separates under heat. We recommenced PrintSmooth Bearing Grease which is cost effective and high performance gears grease from Perma. Apply on gear that is not in contact with filament, like drive/transmission gears.
-
Run a shorter test print with a known calibration file we usually run some non time urgent jobs. Compare the wall finish and infill to your baseline.
One non-negotiable lesson from farm operation: always have spares on hand. Printed tension arms, hardened drive gears, ceramic guides, and a tube of grease need to be in a drawer, not on order. A single missing component during a time-critical job can cascade a minor wear issue into a missed deadline. I’ve seen a $3 gear delay a commercial shipment simply because nobody had checked or stocked them. Staging repairs means minimal true downtime; scrambling for parts means everything stops.
Material Upgrades for Long Life
If you’re printing your own extruder components, which many custom toolhead builders do the material choice separates a 200-hour part from a 2000-hour part.
For structural tension arms that experience constant flex in a warm enclosure, we’ve had outstanding results with SLS or MJF-printed PA12 with carbon fibre or glass fibre fill. These are not brittle like an FDM-printed PETG arm; they have a controlled, durable flex that doesn’t creep under heat. An FDM PETG arm in a 60°C chamber will gradually sag and lose tension over days; the PA12-CF part holds its shape and spring.
For filament guides at the extruder entry, the ideal is a ceramic ring pressed into a printed or machined housing. This is the same principle used in multi-material inlet funnels. If ceramic isn’t feasible, a polished stainless steel tube bonded into the guide is the budget-friendly alternative that still far outlasts bare plastic.
And for drive gears, the rule is clear: hardened steel for any abrasive filament, full stop. No exceptions.
The Post-Processing Step That Prevents Early Failure
The number one mistake I see repeatedly is bolting on a beautifully printed PA or nylon extruder component without post-processing it, and then blaming the material when it fails prematurely. For any high-performance filament like nylon or PA, anneal the part per the manufacturer’s recommended cycle. This dramatically improves layer adhesion and heat deflection temperature. A non-annealed nylon arm under tension in a heated enclosure will creep; an annealed one will hold.
The other half is lubrication. Apply a thin film of plastic-safe bearing grease to gear teeth and rotating shafts during assembly. Too much attracts airborne filament dust and turns into a grinding paste. I prefer synthetic PTFE-based greases that don’t react with printed polymers and don’t separate at elevated temperatures. A dry gear is a dead gear running on borrowed time.
Wear is not a printer defect; it’s a predictable operating cost. When you schedule around it, extruder maintenance becomes a 15-minute task that keeps your farm predictable. When you ignore it, the same wear becomes an emergency that ends with a printer down and a client chasing an ETA. Stock the spares, set the calendar, and trust the signs your prints are already showing you.